How to Structure a Reinforcement Learning Project (Part 2)
Posted on Mon 24 August 2020 in posts • 7 min read

Figure 1: Photo by Ricardo Cruz on Unsplash
Hello, Hello! Welcome back to the second part of my series on How to structure RL projects !
- Start the Journey: Frame your Problem as an RL Problem (get it here!)
- Choose your Weapons: All the Tools You Need to Build a Working RL Environment (We are Here!)
- Face the Beast: Pick your RL (or Deep RL) Algorithm
- Tame the Beast: Test the Performance of the Algorithm
- Set it Free: Prepare your Project for Deployment/Publishing
In this post, we discuss the second part of this series:
Choose your Weapons: All the Tools You Need to Build a Working RL Environment

(Note: This post is a follow up of the first part, in case you missed it, please take a look at it here)
In the previous article, we learned how to frame our problem into a Reinforcement Learning problem. Today we are moving to the next step: building the needed infrastructure for running Reinforcement Learning algorithms.
1. Investigate the Environment Structure
Before implementing any Reinforcement Learning algorithm, we need to familiarize ourselves with the environment that we are using. For the sake of clarity, we will refer to our environment as the simulation, as in most cases the agent is added to a simulated environment that mimics the real environment where the agent will be deployed.

Figure 2 : MuJoCo is a famous Robotics simulator used extensively in RL (source: MuJoCo)
First, let's investigate the nature of the simulator we are using:
- Is it an Event-Driven Simulator?
There are various types of simulators that can be adapted for RL, and one of the most famous simulation paradigms is the Event-driven simulation.
In this paradigm, the simulation does not run over a continuous interval of time, but rather over a sequence of "events". The simulator schedules in advance the events that might be happening at specific instants, and between any two time instants where no events are happening, the simulator just "glosses over" this interval and "moves on" to the next event.
Because events are scheduled beforehand in such a simulator, the results might have been already predicted and it becomes hard (but not impossible) for an agent to intervene in changing the outcomes of a simulation.
- What Type of Simulator is Employed?
Another important aspect is the type of simulator, since it would affect the type of connection and interface library to be employed later on.
Let us take the example of a Unity game simulator or an Atari game emulator. In this case, the agent has to participate in a specific game continuously over a period of time, performing specific game actions based on specific observations and receive a reward signal accordingly.
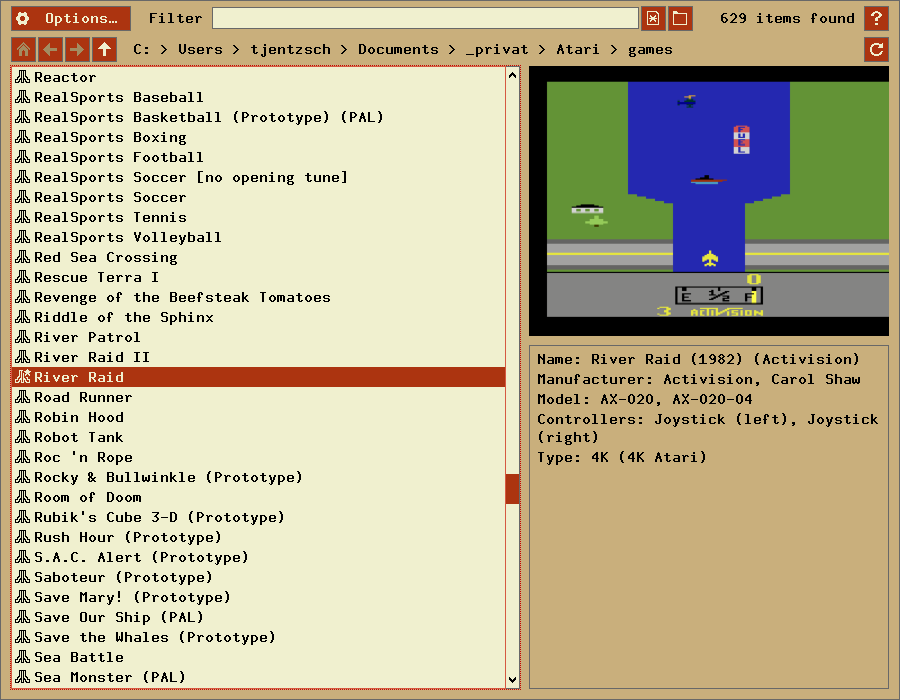
Figure 3: Stella - an emulator of the Atari 2600 gaming console (source: Stella)
But the problem is: How the agent which is a running program, will connect to the running emulator at the same time? What is the best way to synchronize the two programs?
-
One solution is to use HTTP POST and GET requests to be able to connect to the emulator over an HTTP connection in a consistent and guaranteed manner.
-
In other cases, the simulator might be a running code with which the agent will interact. In such cases, a client-server socket program might be easier to code and control later on.

Figure 4: Another example of a running program is the maze game, the agent has to communicate with the maze environment for every new action (source: UnityList)
We will explain the different types of connections in section 4.
2. Choose the Environment Interface
Next it is time to learn how to correctly define the interface that connects the environment to the RL algorithm. Many Python libraries were specifically built to simplify training RL agents like OpenAI baselines, Tensorforce, and tf-agents. For a helpful comparison between the existing libraries, please refer to this insightful article.
After choosing your library, you soon realize that almost all of the libraries rely on specific formats for defining the environment interface like OpenAI gym format and PyEnvironment format.
We will discuss OpenAI gym format as it is one of the most famous and widely used formats.
OpenAI gym is an "is a toolkit for developing and comparing reinforcement learning algorithms" developed by OpenAI. It houses a variety of built-in environments that you can directly use such as CartPole, PacMan, etc...
Figure 5: OpenAI gym is a toolkit for developing and training RL algorithms (source: towards data science)
And most importantly, it allows you to create your custom environment interface using the gym format:
import gym
from gym import error, spaces, utils
from gym.utils import seeding

class Basic(gym.Env):
    def __init__(self):
        pass

    def step(self, action):
        pass

    def reset(self):
        pass

    def render(self, mode='human'):
        pass

    def close(self):
        pass
Let's dissect each part:
def __init__(self):
    pass
This is the environment's constructor, where we initialize the environment variables and, define the action space and the observation space.
def step(self, action):
    pass
We use this method to allow the agent to take an action inside the environment, consequently the method returns a reward value and the new observation of the environment.
def reset(self):
    pass
This method resets the environment to its initial state, and returns the initial observation of the environment. It is recommended to use this method at the beginning of each simulation to have access to the initial observation of the environment.
def render(self, mode='human'):
    pass
The render method is usually used to provide a visual presentation of the environment.
def close(self):
    pass
The close method closes the connection with the environment, resets the simulator and stops the agent from interacting with this instance of the simulator.
3. Understand the Sequence of Events
Before training any RL agent, we need to set up the sequence of actions and observations that occur when the agent is interacting with the environment.
This kind of design decision might look at first trivial, but it is a delicate, yet an essential, part of the design. Usually, a correct sequence of events should follow the diagram below:
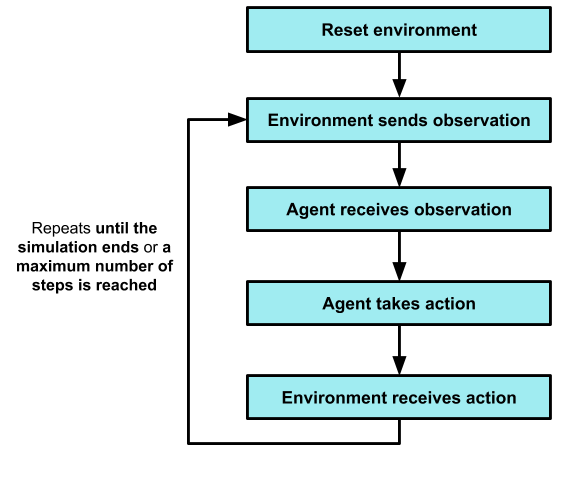
Figure 6: Sequence of interactions
Confirming that your design fits neatly with this paradigm guarantees that the interactions between the agent and environment are correct and synchronized.
4. Implement the Pipeline Connecting the Environment and the Agent

Figure 7: Photo on Unsplash
Our last step is to figure out the best way to build the pipeline connecting the environment and the RL agent. Below I will list some of the tools I have come across when I was developing the pipeline for my environment. These tools can be applied to almost any other environment:
1. Client-Server Socket Programming:
 -
-
Figure 8: A Socket Programming Illustration by Real Python
The agent is the program that interacts with the environment in multiple simulations over time, therefore it is natural to consider the agent as the server. The server spawns the connections with multiple clients, which are the simulations of the environment.
Such a structure is the right fit whenever the speed of connection is important; using protocols such as TCP and UDP can provide a fast connection between the client and server. Although we gain in terms of connection speed, we might need to come up with a more complicated implementation, since we are in charge of synchronizing the transportation of data from the client to/from the server.
2. HTTP requests:
Figure 9: An HTTP Requests Illustration by Real Python
A more sophisticated structure would be to establish an HTTP connection between the client and the server. Although using HTTP is easier than other protocols, we lose in terms of connection speed due to the additional layer that HTTP adds.
If you are looking for a detailed guide for implementing the previous techniques in Python, I highly recommend this tutorial for socket programming and this one for HTTP requests by Real Python.
3. Input/Output from/to external files/console:
Another approach would be as follows:
- The agent to read data outputted from the environment through an external file or the console
- The environment receives the next action to be done as input from the console or an external file
- The environment sends the observation and the reward to an external file or the console
- We repeat this cycle until the simulation ends or the maximum number of steps is reached
However, we need to take care of the type of file and the type of I/O operations used, otherwise the speed of connection might be affected.
5. Test the Environment
I cannot emphasize enough how important is to test, test, and test the environment, the interface, and the connection pipeline. We need to be confident that our implementation is working properly, else our RL agent might not learn correctly or even worse might learn to exploit the errors or loopholes found in the environment!
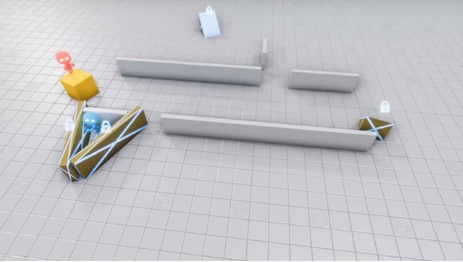
Figure 10: In OpenAI's famous Hide and Seek RL experiment, the seekers learned to exploit the simulator physics to "surf" over the boxes and catch the hiders! (source: OpenAI)
Below are some procedures I found helpful to gauge the functioning of the environment:
- Using a random agent: Simply enough, using an agent whose actions are randomly generated can be helpful to check the performance of the agent in the environment. Since all actions are of equal probabilities, we can make sure than many corner cases are being tested and the environment is running successfully.
- Recording the number of steps: Running a random agent can give us an estimate of the number of steps an average agent might take inside the simulation. It can also help us to get an estimate of the duration of each simulation, and therefore an estimate of the duration of the training phase.
Conclusion
In this article, we learned about the tools we need to build an RL environment and a communication pipeline connecting the environment and the agent.
With that, we reach the end of the second part of this series!
Wow! How far we reached!
In the next part: " Face the Beast: Pick your RL (or Deep RL) Algorithm ", I am going to discuss how to choose the best algorithm needed to train a successful RL agent with all the tools you might need!
Buckle up and stay tuned!
